Anonymous

Sun Visor Overhaul

Here’s where to discuss anything specific about your standard(ish) car or something that applies to the model in general.
Post Reply
Workshop Help
TRiffic
Posts: 1891
Joined: 27 Feb 2007 23:52
Location: Worldwide

Sun Visor Overhaul

Postby Workshop Help » 28 Mar 2008 17:55

This story starts out as the classic, 'There I was'.

There I was, minding my own business at the kitchen sink washing the casserole dish when in walks Abner with the sun visor from the TR7 and sits down at the table. "What's we'uns has got here is a Bag-o-Rot that sags down into my vision", he mutters, "Short of starting up a sun visor factory, is there any way this can be fixed?"

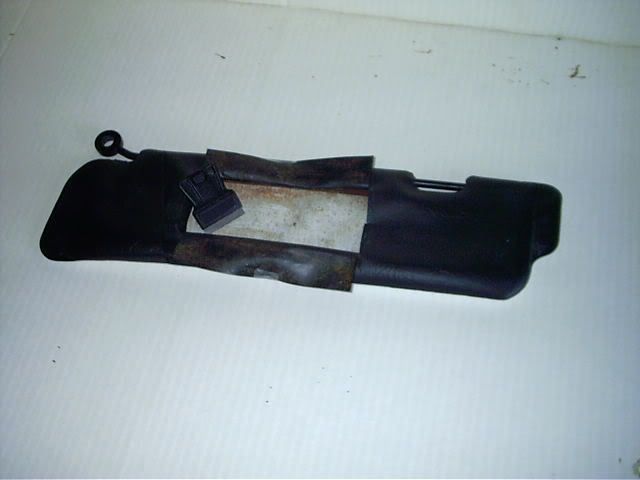
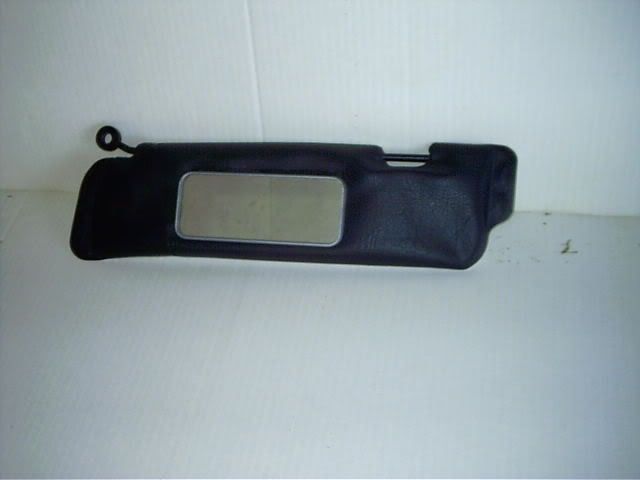
Little did I know the solution was in my right hand. This visor is typical of all TR7 visors with the interior space filled by an expanding foam that deteriorates faster than it should. I have often wondered, if other than just being cheap, if there was an economical yet sturdier filler material that could have been used. As Abner has a short temper, we decided to perform a bit of exploratory surgery on the visor. He fetched the vacuum cleaner and a section of newspaper to place under it. We had glued on a small vanity mirror of about 2 1/2" x 6 1/8" mounted in a plastic holder many years ago. We don't recall where it came from, probaly some auto parts store or drug store.

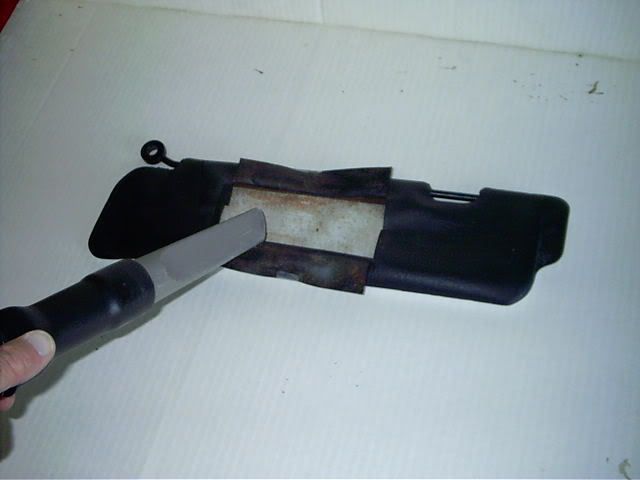
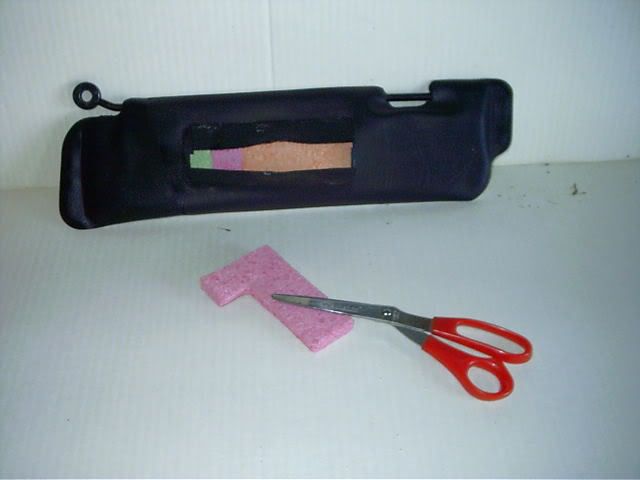
We peeled off the mirror, and with a razor blade, sliced about a 5" horizontal cut and about a 1 1/4" verticle cut on each end of the horizontal cut. This enabled access for the vacuum cleaner to suck out the rotted foam from the interior of the visor. Now came the fun part, what could we use as the new filler.

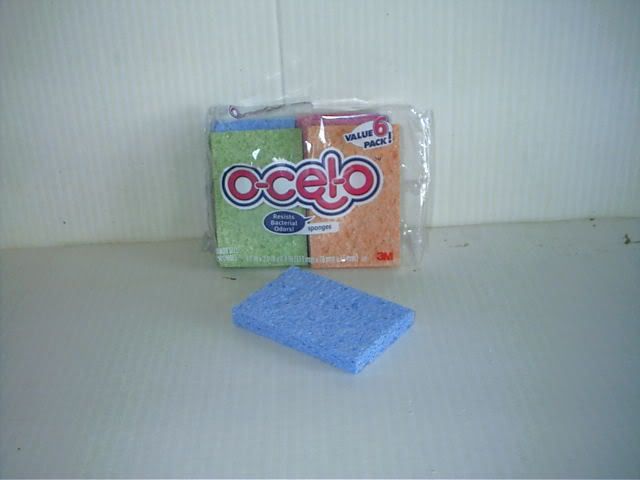
We pondered things like carpet foam padding, the felt pad from underneath the old typewriter in the office, even the possibility of expanding insulation construction foam. Then I glanced around the kitchen and saw it, the dishwashing sponge. "Abner! You and Caleb go into town to the store and bring back the items on this grocery list and a package of plain dishwashing sponges and some more glue."

While they were gone I finished the dishes in the sink.

What they came back with was a six pack of 1/2" x 2 5/8" x 4 1/2" plain dishwashing sponges. In their dry state they are slightly malleable.

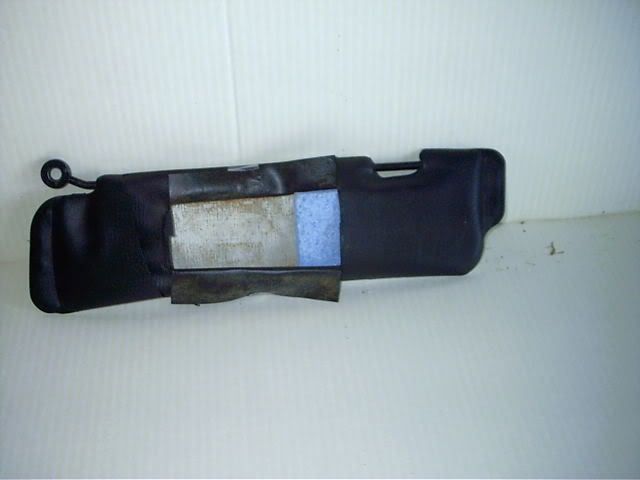
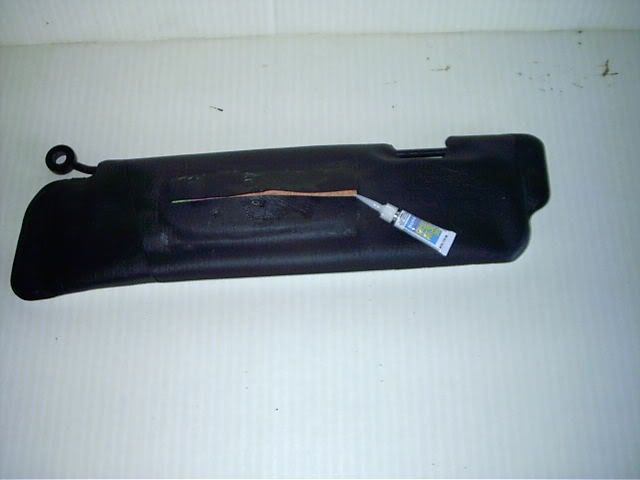
Into the visor cavity we inserted four of the dry sponges and with the fifth, trimmed it to fit the remaining space. The two flaps were folded back down, instant drying glue was applied to the backside of the small vanity mirror and pressed down to seal.

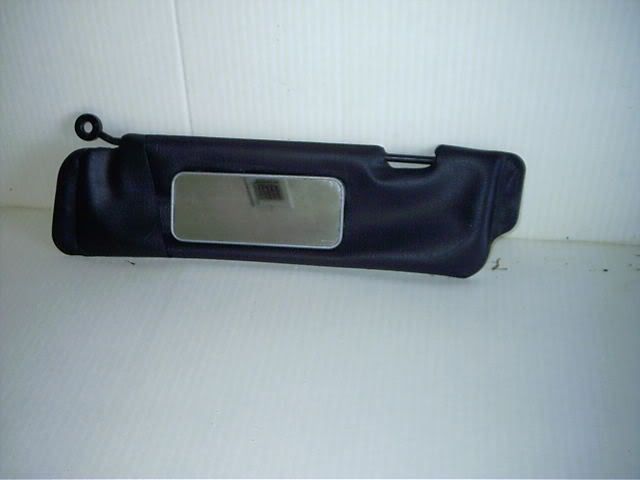
It has been over a week and all has gone well with no problems from delamination. The visor holds it's shape and functions as it should. No more sagging. We have yet to try this on the passenger side visor with it's built in mirror.

Costs? The package of sponges was about $3.98 and a two pack of Super Glue was $1.99. The mirror was paid for long ago tho I suspect less than $10.00 would buy another similar one. And, I have one sponge left over. Time expended, not counting going to the store, less than 15 minutes.

For your enjoyment, here are the photos as the operation progressed.
Image

Image

Image
Image
Image
Image
Image
Image

Mildred Hargis

Red
Wedge Pilot
Posts: 447
Joined: 30 Sep 2005 07:47
Location: United Kingdom

Postby Red » 28 Mar 2008 18:21

Great work!

I'm in the middle of pulling the interior out of mine, and was wondering what to do about the visors. Looks like this might be just the thing.

The mirror on mine is especially bad - the silver on the back is so faded, you can't actually see anything in it anymore.

Garry

1976 2.0 (soon to be 3.5!)FHC
http://reds-tr7.blogspot.com/

FI Spyder
TRemendous
Posts: 8917
Joined: 03 Jul 2006 19:54
Location: Canada

Postby FI Spyder » 28 Mar 2008 19:23

My LH visor rattles from the dried foam inside and is bothersome when driving. (No rattles in my car please.) I was thinking of doing the same thing although had considered slitting down an edge where it would be less noticable but may be harder to seal up and putting in expanding foam. Your solution might be better.

Red, take another look at your mirror. You may find that, like mine, it is not the silver of the mirror that is off but that that clear plastic that covers it has discoloured brown from UV. It only happens to half as half is hidden by top of winsheild and half is exposed to the sun. I'm thinking of cutting out the plastic and gluing on a piece from used clear shower curtain which is about the same thickness.

Mildred, what kind of glue did you use? Crazy glue or some kind of plastic glue?

TR7 Spider - 1978 Spifire - 1976 Spitfire - 1988 Tercel 4X4 - Kali on Integra - 1991 Integra
Image

paul w
Wedgista
Posts: 1421
Joined: 12 Feb 2007 20:36
Location: United Kingdom
Contact:

Postby paul w » 28 Mar 2008 20:03

Quick thinking,Mildred,i was thinking of getting new ones from
Robsport,but this is a clever idea to save some money.
F1,red,if that plastic is cloudy try using a cutting polish - we
have T cut over here,this can polish out the milky film.I did this
on the soft tops plastic windows,it really works with a bit of effort

See ya. Paul


Image

silverseven
TRemendous
Posts: 4451
Joined: 11 Dec 2003 23:44
Location: Canada
Contact:

Postby silverseven » 29 Mar 2008 00:47

<blockquote id="quote"><font size="1" face="Century Gothic, Verdana, Arial, Helvetica" id="quote">quote:<hr height="1" noshade id="quote"><i>Originally posted by FI Spyder</i>


....take another look at your mirror. You may find that, like mine, it is not the silver of the mirror that is off but that that clear plastic that covers it has discoloured brown from UV. It only happens to half as half is hidden by top of winsheild and half is exposed to the sun. I'm thinking of cutting out the plastic and gluing on a piece from used clear shower curtain which is about the same thickness.
<hr height="1" noshade id="quote"></font id="quote"></blockquote id="quote">


Mine was like this too spyder.....instead of recovering the mirror , i simply did like you mentioned and cut out the clear vynil with an exacto blade and remove the yellow\faded plastic thing completely , simply leaving the exposed glass and the blue covering around the edges.....
This was years ago, and I've never had any problems since....even after a few accidental wettings......

Ron.

ImageImageImage

Rblackadar
TRiffic
Posts: 1782
Joined: 06 Jun 2004 06:12
Location: USA
Contact:

Postby Rblackadar » 29 Mar 2008 02:23

Mildred! Absolutely Brilliant!!!! [;)] Trust me alot of folks here will be doing that soon I'm sure. Thank you for posting pictures too.

Rich in Vancouver
Swagester
Posts: 781
Joined: 10 Jun 2007 15:20
Location: Canada
Contact:

Postby Rich in Vancouver » 29 Mar 2008 02:35

"This was years ago, and I've never had any problems since....even after a few accidental wettings......"

Ron.

Sorry to hear about that Ron![:D]

1975 TR7 ACL764U
Image

Workshop Help
TRiffic
Posts: 1891
Joined: 27 Feb 2007 23:52
Location: Worldwide

Postby Workshop Help » 29 Mar 2008 19:47

One small clarification, if you please. The sponges are inserted in their dry state, right from the package, and NOT glued into place. NOT glued. This way any future removal will not damage the visor and their 1/2" thickness pretty well fills the cavity. Note the visor has a large-ish wire surrounding the perimeter. This is what provides your 'grip' as it's flipped up and down. The foam stuffing has no other function than as a filler.

Mildred Hargis

john
TRiffic
Posts: 1648
Joined: 22 Sep 2003 13:54
Location: United Kingdom
Contact:

Postby john » 30 Mar 2008 08:31

Mildred you should be on Blue Peter they only ever got to use washing up liquid bottles, kitchen roll inserts and tin foil from the Kitchen in their everday use for things [:D]

Brilliant

Mine were never in the state you had but had faded, Just as a tip i sprayed them with a plastic trim spray from Halford and was totally amazed at the result. you would never tell they have been sprayed i'm telling you.


[8 whole cylinders worth of punch to ram the world through the windshield and out the rear view mirror. Car & Driver]
1981 Grinnall TR7 v8
1981 Black FHC
1979 & 1980 Black Premium FHC(laid to rest) Sorry :-(
Image

John

Post Reply

Who is online

Users browsing this forum: No registered users and 298 guests

cron