Anonymous

Rear Brake and Parts Order

Here’s where to discuss anything specific about your standard(ish) car or something that applies to the model in general.
Post Reply
Urchin
Wedge Pilot
Posts: 479
Joined: 17 Jan 2004 22:33
Location: USA
Contact:

Rear Brake and Parts Order

Postby Urchin » 28 Dec 2007 01:10

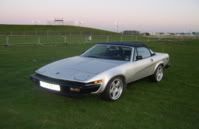
The day before Christmas, the rear brake kit I ordered from Vic Brit arrived for my '80 Spider. The car had failed its annual inspection because of a leaky right rear wheel cylinder. The island's local mechanic offered me a deal I could not refuse. If I did the work on the car when a bay was free at this shop, he would be around to help me with additional advice and/or tools.

This afternoon, I called the mechanic to see when he could accommodate me. "Come in right now. I just need you to finish before tomorrow because I will need the bay.

So I drove the TR-7 there in a snowstorm. By 2:00 pm the car was jacked up on the right side. The first steps were not propitious. The lug nuts would not come off with a breaker bar, or with the weaker air wrench of the garage. Only the "truck" air wrench would loosen them, and then not right away. Yes when they came off, there was evidence of the gray Neverseize I always use.

The wheel itself needed a pounding with a rubber mallet, and then of course, I needed to use my hand impact screwdriver to remove the screw on the brake drum. At least the drum came off with just a tap.

Sure enough, the cylinder was leaking. Now to make certain that I had every part needed for the job, I had ordered the Vic Brit rear brake kit. Sure enough, there were the cylinders, the shoes and a lot of envelopes with lots of unidentified parts.

I had studied J Clay's wonderful slide presentation on rear brakes but promptly seemed to forget everything in the problems removing old parts. Now these shoes were covered with fluid but they had a lot of lining left. I was pretty certain these had been done about 4 years ago; the front discs had been done 2 years ago.

First problem came in removing the brake lines from the wheel cylinder. The larger one could be turned with a flare wrench but the smaller lower one could not be accessed because it is recessed into the backing plate. Who thought that one up? What was the drug intake at the BL engineering studios in the 70's? I had to resort to the most heinous act of using a small vice grip and a screwdriver as a lever to turn the locating nut and pray I did not break a line. When they finally came off, you had to make certain that you could remove the stupid C clip on the back. Land Rover just bolted the cylinder onto the backing plate - why not Triumph?

With the cylinder off, you realized that you could not put a stopper over the brake line because you had no room. So every so often, I wasted time crawling out from underneath the car adding fluid to the brake reservoir.

Now came the shoes and the self-adjusting pieces. I removed the two round spring clips and discovered that while my "complete kit" included the springs and the pins, there were no round replacement clips - the things most likely to break.

It wasn't until I started reassembly that I realized Vic Brit's other replacement springs did not include the long, double spiral one. Nor are any of the parts - springs, angled metal, C clips - included! First, I put the adjuster mechanism on the wrong side of the shoe so i wasted a lot of time trying to figure out how things went together. The Haynes Manual section on the rear brakes is very incomplete - I never could find the adjuster portion [next time, bring the shop manual you bought this September, Jeff!!].

Finally, the mechanic couldn't make sense of it either and he suggested the obvious. Remove the other wheel and drum and look at the brakes in situ. Great idea, except that the drum on the that side would not move at all. I tapped for about 10 minutes with a metal hammer trying not to break anything, but just remove the stuck drum. And yes, there was plenty of evidence of dried Neverseise, too. When it finally came off, the location of the springs, adjusters and shoes become obvious. Fortunately, the shoes on that side had a lot of lining left and the cylinder was dry.

Now it's 5:00 pm and some local fishermen have stopped by with drinks for the mechanic. Once the mechanic imbibed, the power of the 50-50 mix of vodka and orange juice [really powerful screwdrivers] took him out of the picture to help me. But by then, the reassembly could proceed apace, if with the assistance of several bystanders. "Jeez, Jeff, aren't you done yet?!!!"

By now it's really snowing outside, and there's no one to really help bleed the car. But the pedal felt ok and with luck, not much air got into the system. I'll save that for another time

So now I think I will remove the rear drums more often just to lubricate everything and prevent corrosion. And I will NEVER throw away a part when I have ordered a "complete kit." You'll need all the adjuster parts, the C clips, the round clips for the pins and the large spring that runs across the wheel cylinder between the shoes.

Thanks to everyone for their help!

Jeff


Jeffrey Aronson
P.O. Box 90
Vinalhaven, ME 04863
USA
'80 TR-7 Spider
'66 Land Rover Series II-A [2]
'66 Corvair Monza

Hasbeen
TRemendous
Posts: 6474
Joined: 28 Apr 2005 12:32
Location: Australia
Contact:

Postby Hasbeen » 28 Dec 2007 01:46

Well, How did they work, on the way home, in the snow?

Or did you get into the screw drivers, too, & are still there?

Hasbeen

jclay (RIP 2018)
TRemendous
Posts: 6027
Joined: 08 Jul 2006 17:13
Location: USA

Postby jclay (RIP 2018) » 28 Dec 2007 04:09

Having read Urchin's account of rear brakes, I do remember that the Pull Off Springs have to be ordered separately. Sorry Urchin!

The following note has been added to the Rear Brake rebuild page of my site.

" Note: You will need the Rear Brake Kit and one each of the two Pull Off Springs, one for each side, as they do not come with the kit. If you want to do a COMPLETE rebuild, you will also have to order the Adjuster Kit. Removing the rear drums: Method 1. Look at the last photo. Note the two large holes in the drum and that you can see the edge of the axle hub at the inside part of the hole opposite the axle flange. You can wedge two screwdrivers into each little space in the hole and drive them in to wedge the drum off the assembly. Method 2: If that fails to work and you did purchase the Brake kit, then you can grind the heads off the Hold Down Pins at the back plate and remove the drums with the shoes still attached to the drums."

The photo below shows the parts from the kit on the left, the Pull Off Spring, at the very top and the brake adjuster at the bottom (I did not order the new adjuster kit, just rebuilt the one ones).

Image

Rich in Vancouver
Swagester
Posts: 781
Joined: 10 Jun 2007 15:20
Location: Canada
Contact:

Postby Rich in Vancouver » 28 Dec 2007 05:17

Just be glad you don't have a 4-speed. The springs are simply not available for that axle. I modified some spare springs I had for my 1955 MG Magnette!

Glad you had fun!

Richard

1975 TR7 ACL764U
Image

Jolyon39
Wedgista
Posts: 1028
Joined: 30 Jul 2004 01:54
Location: New Zealand
Contact:

Postby Jolyon39 » 28 Dec 2007 07:57

Two comments to make.

1. Brake shoes soaked in brake fluid.

I was told of a method to fix these by an aviation mechanic who serviced combat aircraft in the Pacific during WW2.

Apply a blow torch to the lining and the fluid will boil out of it, then put back on the aircraft and they will stop the aircraft at its next landing. (Apparently spares were often in short supply and the hydraulics were always getting shot out with fluid going everywhere.)

I used to do this all the time when I was a kid and teaching my self to repair the brakes on my cars. It really works!

2. Removing a drum with shoes rusted to it.

I used a Brick bolster applied to teh back edge of the drum and hammered hard. This spreads the load over a larger area and removed some real solid ones on an old axle I recovered. (I read above that clever idea from Jclay of grinding off the ends of the hold down pins for the shoes and wish I had tried that). Good stuff!

cheers,

Jolyon

Beans
TRemendous
Posts: 7797
Joined: 15 Mar 2006 19:29
Location: Netherlands
Contact:

Postby Beans » 28 Dec 2007 08:59

<blockquote id="quote"><font size="1" face="Century Gothic, Verdana, Arial, Helvetica" id="quote">quote:<hr height="1" noshade id="quote"><i>Originally posted by Jolyon39</i>

...a blow torch to the lining and the fluid will boil out of it, then put back ...<hr height="1" noshade id="quote"></font id="quote"></blockquote id="quote">
That's fine on brakeshoes with riveted linings.
But I wouldn't recommend it with glued/bonded linings.

<center>Image
<font color="blue"><i>1981 TR7 FHC Sprint (better known as 't Kreng)
1981 TR7 DHC (not very well known yet, but back on the road)
Also a 1980 TR7 DHC, 1980 TR7 DHC FI, 1981 TR7 FHC
http://tr7beans.blogspot.com/</i></font id="blue"></center>

Urchin
Wedge Pilot
Posts: 479
Joined: 17 Jan 2004 22:33
Location: USA
Contact:

Postby Urchin » 28 Dec 2007 12:03

No reason to apologize, J Clay. Vic Brit does not indicate much about what is missing in their complete kit. Where would you get the adjuster kit - do the two little coil springs come with it?

What I really needed was a way to play your presentation on a screen large enough to be seen [not my PDA] and with filthy hands!

The brakes worked fine driving but of course, when you're dancing along in the snow, you don't really use them much. I could not go fast enough to test them very well. I'll have to wait until the roads are clear again.

Jeff

Jeffrey Aronson
P.O. Box 90
Vinalhaven, ME 04863
USA
'80 TR-7 Spider
'66 Land Rover Series II-A [2]
'66 Corvair Monza

Jolyon39
Wedgista
Posts: 1028
Joined: 30 Jul 2004 01:54
Location: New Zealand
Contact:

Postby Jolyon39 » 28 Dec 2007 19:29

Good point Beans but I have done it to glued shoes as well.

The heat is not more than heavy braking and is isolated as you sweep the torch slowly down the face of the brake material.

Jolyon

john 215
TRemendous
Posts: 6867
Joined: 03 Dec 2006 17:12
Location: United Kingdom
Contact:

Postby john 215 » 28 Dec 2007 23:45

Hi,
When i was a apprentice i was taught the same trick,lighter fuel all over the shoes and watch it burn [:0]!!! The 'old boy' was ex RAF must be something they were taught.
Cheers John.

LIVE LIFE A QUARTER OF A MILE AT A TIME!
1979 3.5 FHC(STATUS PENDING!!)
Image
1982 2.0 DHC Soon to be a 4.6 fire breather!!
Read My Blog http://www.waringstowntr7s.co.uk/blogs/ ... hp/John215

Hasbeen
TRemendous
Posts: 6474
Joined: 28 Apr 2005 12:32
Location: Australia
Contact:

Postby Hasbeen » 29 Dec 2007 01:35

Fortunately our modern bonding materials are much better than they
were a few years back.

In 1968, when General Motors were getting ready to release the first
Holden Monaro, I spent a bit of time at Lang Lang, the Holden
testing facility. I was helping to turn that original GTS 327 into
a Bathurst winner.

The first time I got into a 327, I did about 20 miles, & came in to
muck with a couple of things. After a 5 minute stop, I only got a
couple of miles, when I lost the rear brakes, & spun off into the
scenery. I still had front brakes, so cruised slowly back to the pit
area.

When they pulled the drums off we found bare shoes, with a mass of
chopped up lining material, in the bottom of the drum.

I had parked with the hand brake on, & 20 miles, of racing driving
had got the drums so hot, it had cooked the bonding material.
GM had been using that bonding agent, in production, for 2 years,
without any problem. They added rivets to production brakes for a
couple of months, while they tested new bonding materials.

After fitting some rivited shoes, I went out again, but only got
another couple of miles, when the front end, & steering went all
funny. [see how good I am with all these high tech terms].

I wobbled my way back to the pits, where we found the center of one
front wheel, had torn over 2 of the wheel nuts, & split in 2 other
places. The engineers were very pleased with this, as they reckoned
they now knew how to improve the wheel.

General Motors was the only owner I ever drove for, who was pleased
whenever I broke their car.

Hasbeen

jclay (RIP 2018)
TRemendous
Posts: 6027
Joined: 08 Jul 2006 17:13
Location: USA

Postby jclay (RIP 2018) » 29 Dec 2007 15:45

In high school, I drove a Nash Metropolitan. This is the car that started me working on automobiles! I had to work on it all Sunday afternoon, so I could drive it another week!

The transmission had a shift lever pin that would shear about every week and the spider housing in the differential would break at the pinion ring. The most annoying thing was the wheels. The metal around the nuts holding them on the car would just break away from the wheel. The car would shake quite a bit and by the time I would get home, there would only be one hole intact. I had to go to all of the wrecking yards to get enough wheels to keep the car going.

Hasbeen
TRemendous
Posts: 6474
Joined: 28 Apr 2005 12:32
Location: Australia
Contact:

Postby Hasbeen » 30 Dec 2007 02:55

Just as well those things had skinny tyres, & low horse power,
jclay, or you may not have made it through school.

I have always been attracted to them, & the Austin A90 Atlantic soft
top, but never enough to go look for one.

Hasbeen

bmcecosse
TRemendous
Posts: 2399
Joined: 14 Apr 2007 21:54
Location: United Kingdom
Contact:

Postby bmcecosse » 31 Dec 2007 16:46

It's really not a good idea to try to 'save' oil contaminated brake shoes - they are never quite the same - and deep seated oil soon works up to the surface again. I've tried them all (when poor student) - boiling in washing soda/fire/oven - none worked for any length of time. Always use new shoes!
The Nash Met was basically a Morris Minor/Wolsely 1500 - and wheel problems are virtually unknow on these cars. I suspect the wheel nuts must have been seriously overtightened at some point - or, left loose so the wheels wobbled about on the studs!

ImageImage

Post Reply

Who is online

Users browsing this forum: No registered users and 129 guests

cron