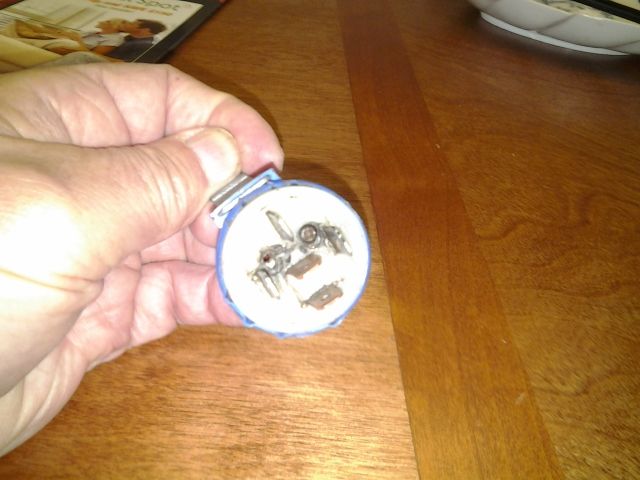
Start by loosening the two screws at the bottom of the relay but do not remove them completely. There is only one screw showing in the picture.
[url="http://s615.photobucket.com/user/nickmi/media/20141126_093744_zps0d998bc9.jpg.html"]
 [/url]
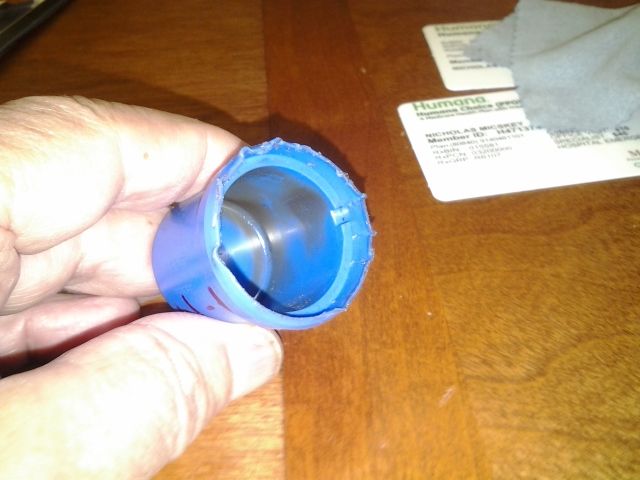
Next, remove the cover from the relay. I do this by cutting the bottom of the plastic so the cover will come off. You will need a pair of pliers to pull the relay out. Grab the center post and work the relay free. I leave enough of the plastic so that the relay will snap in later but the cover is now removable whenever you need to get into it.
[img][url="http://s615.photobucket.com/user/nickmi/media/20141126_093536_zps3e0274db.jpg.html"][IMG]http://i615.photobucket.com/albums/tt234/nickmi/20141126_093536_zps3e0274db.jpg[/img][/url][/img]
Notice that there is a notch on the inside of the cover. That lines up with the nub on the relay base when it is reassembled. The cover shown was removed by the PO. A much neater job of cutting the bottom of the cover can be easily accomplished.
[url="http://s615.photobucket.com/user/nickmi/media/20141126_093341_zps83ad8d33.jpg.html"]
 [/url]
When removing the cover be careful not to disturb the fine coil wires that are attached to the contact posts on both sides of the relay. These are very easy to tear loose. Of the three relays I repaired I had to solder two of them back on. They are not on very securely.
[img][url="http://s615.photobucket.com/user/nickmi/media/20141126_083232_zpsf4d14baf.jpg.html"][IMG]http://i615.photobucket.com/albums/tt234/nickmi/20141126_083232_zpsf4d14baf.jpg[/img][/url][/img]
With the cover off remove the two screws that were previously loosened. You can now carefully maneuver the coil assembly away from the base of the relay. This allows you access to the two contacts that you hear snapping when the ignition switch is turned to start. The square contact will be black and possibly pitted. A small file and/or a small blade can be used to scrape the crud off. The same can be done on the other contact but I found those clean on all three relays.
[img][url="http://s615.photobucket.com/user/nickmi/media/20141126_084438_zpse911bec9.jpg.html"][IMG]http://i615.photobucket.com/albums/tt234/nickmi/20141126_084438_zpse911bec9.jpg[/img][/url][/img]
On this relay the blackened contact can be seen after the coil assembly was moved out of the way.
[img][url="http://s615.photobucket.com/user/nickmi/media/20141126_105607_zps6a7ce9c1.jpg.html"][IMG]http://i615.photobucket.com/albums/tt234/nickmi/20141126_105607_zps6a7ce9c1.jpg[/img][/url][/img]
Once the contacts are clean insert the two screws to secure the coil assembly to the base. Take care that the moveable contacts go inside the of the plastic lip on the relay base. Next, perform a continuity check on the coil to make sure that the fine wire was not broken. Also do a continuity check on the two contacts that were just cleaned. The right contact is attached to the center pole. This is not obvious when looking at the relay. Replace the cover and give it a go.
 [img][IMG]http://i615.photobucket.com/albums/tt234/nickmi/TR7%201975/Yellow.jpg[/img]
nick
'79 TR7 DHC
'76 TR7 FHC

